> ## Documentation Index
> Fetch the complete documentation index at: https://docs.taqtile.com/llms.txt
> Use this file to discover all available pages before exploring further.
# PowerApps Connector Setup
> Learn how to use Manifest Connect for real-time collaboration and remote assistance.
## About PowerApp Connectors
A connector is a proxy or a wrapper around an API that allows the underlying service to talk to Microsoft Power Automate, Microsoft Power Apps, and Azure Logic Apps. It provides a way for the users to connect their accounts and leverage a set of prebuilt actions and triggers to build their apps and workflows.
## Prerequisites
* Azure Subscription
* Azure Active Directory Tenant
* Azure Power Apps Subscription
* Once of the following roles to the client Azure account:
* Global Administrator
* Cloud Application Administrator
* Application Administrator
* Owner of the service principal
* The following roles within the Manifest Web Application:
* Security Admin
## How to Set-up a PowerApp Connector
### Register App in Azure Active Directory
1. Sign into the Azure portal
2. In the Azure portal, search for and select Azure Active Directory
3. Select App registrations
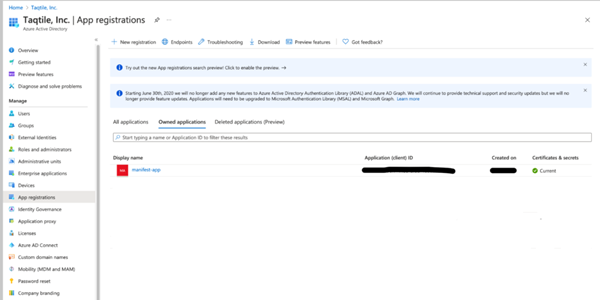 4. Select '+ New Registration'
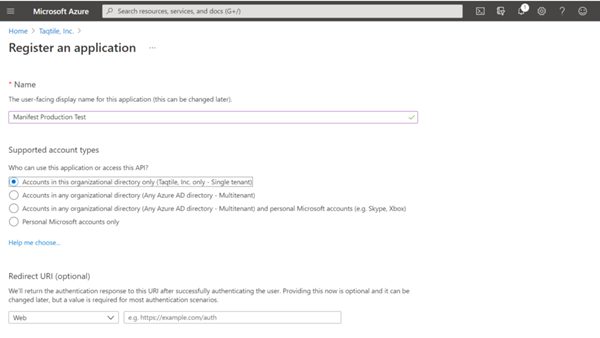
5. Complete the App registration form:
* Enter the desired user-facing display name, eg. 'Manifest'
* Choose the scope for application authentication (most single tenant users will select the first option: Support Account types - select 'Accounts in this organizational directory only')
* Redirect URI is (optional) - leave blank
* Select Register
4. Select '+ New Registration'
5. Complete the App registration form:
* Enter the desired user-facing display name, eg. 'Manifest'
* Choose the scope for application authentication (most single tenant users will select the first option: Support Account types - select 'Accounts in this organizational directory only')
* Redirect URI is (optional) - leave blank
* Select Register
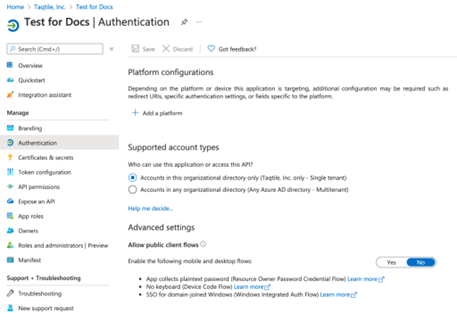
 6. From the App registration screen, under "Owned applications" select the Manifest app you just created
7. Go to the Authentication tab
8. Select + Add a platform
6. From the App registration screen, under "Owned applications" select the Manifest app you just created
7. Go to the Authentication tab
8. Select + Add a platform
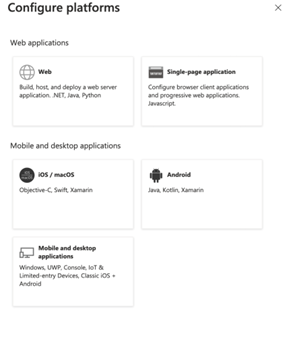
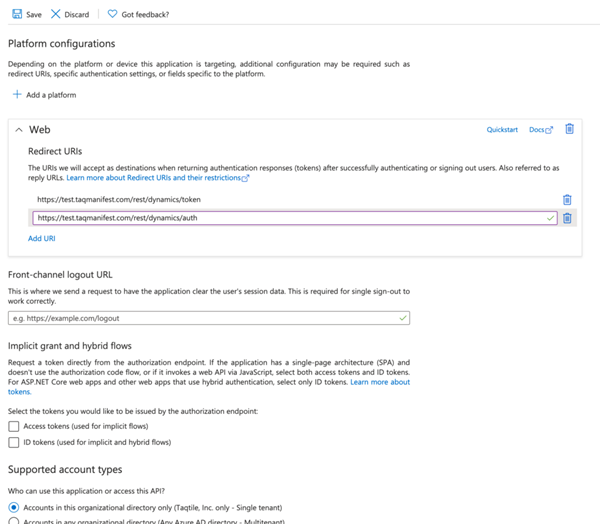
 9. On the Configure platform select Web
 10. Enter the redirect URI of the application
* domain.com/rest/dynamics/token
* domain.com/rest/dynamics/auth
**IMPT!** insert your full Manifest domain URL in place of domain.com eg: [https://mysubdomain.taqmanifest.com/rest/dynamics/token](https://mysubdomain.taqmanifest.com/rest/dynamics/token)
10. Enter the redirect URI of the application
* domain.com/rest/dynamics/token
* domain.com/rest/dynamics/auth
**IMPT!** insert your full Manifest domain URL in place of domain.com eg: [https://mysubdomain.taqmanifest.com/rest/dynamics/token](https://mysubdomain.taqmanifest.com/rest/dynamics/token)
 11. Go to Certificates + secrets tab
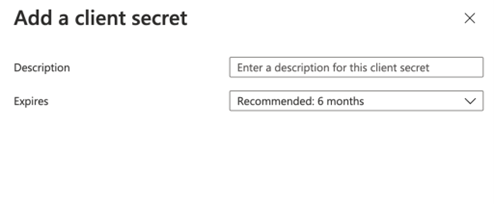
12. Under Client secrets, select '+ New Client Secret' and add a client secret
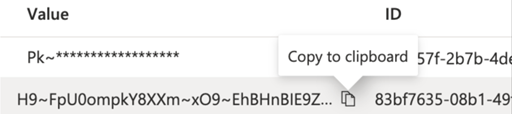
* Provide a description and expiration and a client secret will be automatically generated
* IMPT! Copy the key once created and save this. You will need this to configure your AD in Manifest. Once you leave this screen you WILL NOTE be able to access this secret value again.
11. Go to Certificates + secrets tab
12. Under Client secrets, select '+ New Client Secret' and add a client secret
* Provide a description and expiration and a client secret will be automatically generated
* IMPT! Copy the key once created and save this. You will need this to configure your AD in Manifest. Once you leave this screen you WILL NOTE be able to access this secret value again.
 13. Go to the 'API Permissions' tab
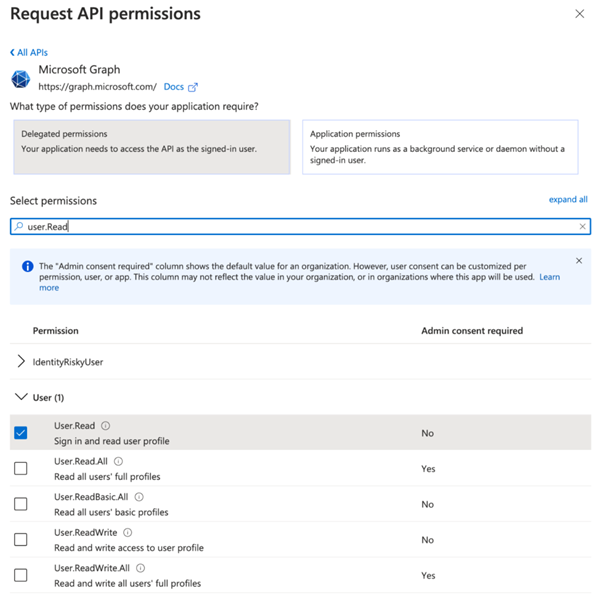
14. Select '+ Add a permission', The 'Request API permissions' window will fly out
15. Under Microsoft API's, select Microsoft Graph. You will be prompted to indicate what type of permissions your application requires.
16. Select Delegated Permissions and search for and then check off the following permissions:
* User.read
* Sites.Manage.All
* Sites.Read.All
* User.Read
13. Go to the 'API Permissions' tab
14. Select '+ Add a permission', The 'Request API permissions' window will fly out
15. Under Microsoft API's, select Microsoft Graph. You will be prompted to indicate what type of permissions your application requires.
16. Select Delegated Permissions and search for and then check off the following permissions:
* User.read
* Sites.Manage.All
* Sites.Read.All
* User.Read
 17. Before logging out, be sure to make note of the following information required to configure your Active Directory in Manifest:
* Application (client) ID: available under App registrations
* Client Secret: create in step 12
* Directory (tenant) ID: available on the Overview tab
### Configuring Manifest with your client Azure AD
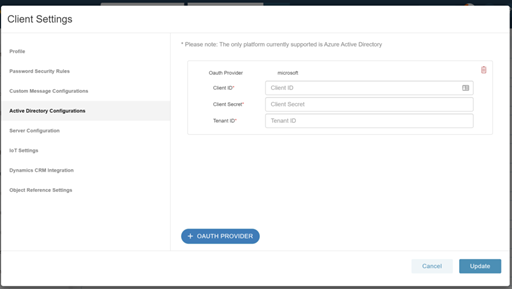
1. Sign into the Manifest Client Portal
2. Select 'Client Settings' and go to the Active Directory Configurations tab
3. Select '+OAUTH PROVIDER'
4. Enter in the following information gathered when adding the Manifest application to your Azure AD tenant:
* Client ID
* Client Secret
* Tenant ID
5. Select Update
17. Before logging out, be sure to make note of the following information required to configure your Active Directory in Manifest:
* Application (client) ID: available under App registrations
* Client Secret: create in step 12
* Directory (tenant) ID: available on the Overview tab
### Configuring Manifest with your client Azure AD
1. Sign into the Manifest Client Portal
2. Select 'Client Settings' and go to the Active Directory Configurations tab
3. Select '+OAUTH PROVIDER'
4. Enter in the following information gathered when adding the Manifest application to your Azure AD tenant:
* Client ID
* Client Secret
* Tenant ID
5. Select Update
 ### Install Custom Connector
1. Login to Power Apps at [https://make.powerapps.com](https://make.powerapps.com)
2. Go to the custom connector page
### Install Custom Connector
1. Login to Power Apps at [https://make.powerapps.com](https://make.powerapps.com)
2. Go to the custom connector page
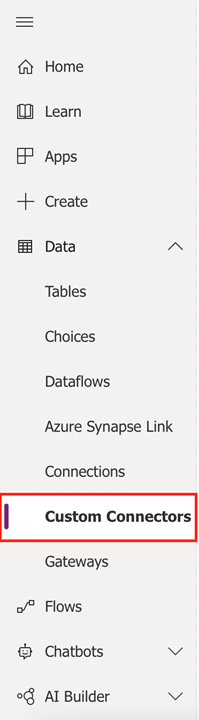 3. Go to Custom connector --> Import an Open API file
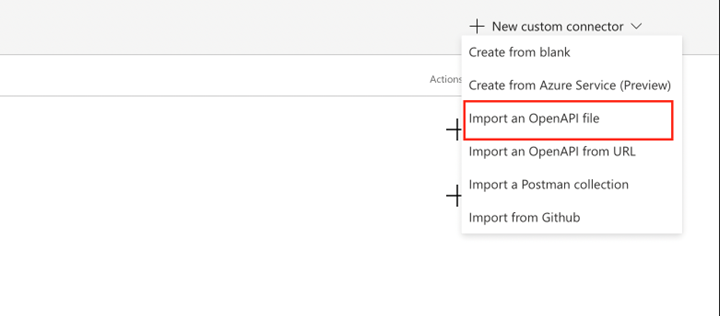 4. Download file below and save it into .json format
5. Import 'manifest\_powerapps.json' file
[manifest\_powerapps.json](images/Taqtile-APIPowerApps.txt)[Download](images/Taqtile-APIPowerApps.txt)
4. Download file below and save it into .json format
5. Import 'manifest\_powerapps.json' file
[manifest\_powerapps.json](images/Taqtile-APIPowerApps.txt)[Download](images/Taqtile-APIPowerApps.txt)
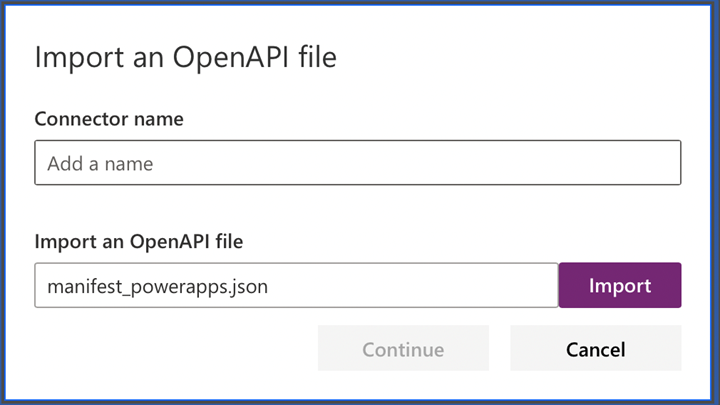 6. Change host to Manifest Instance URI e.g. 'demo.taqmanifest.com' or 'apac.taqmanifest.com'
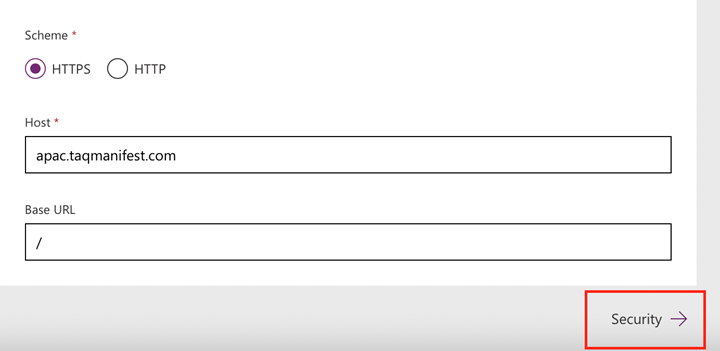
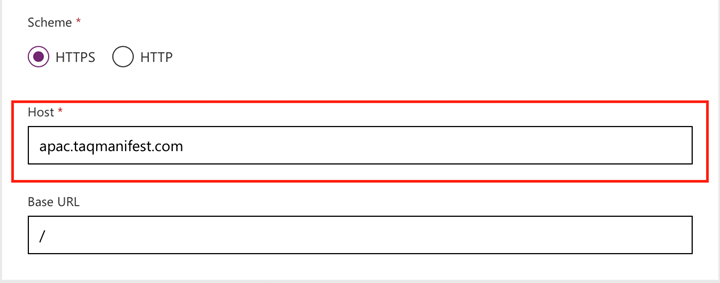 7. Go to the next page 'Security'
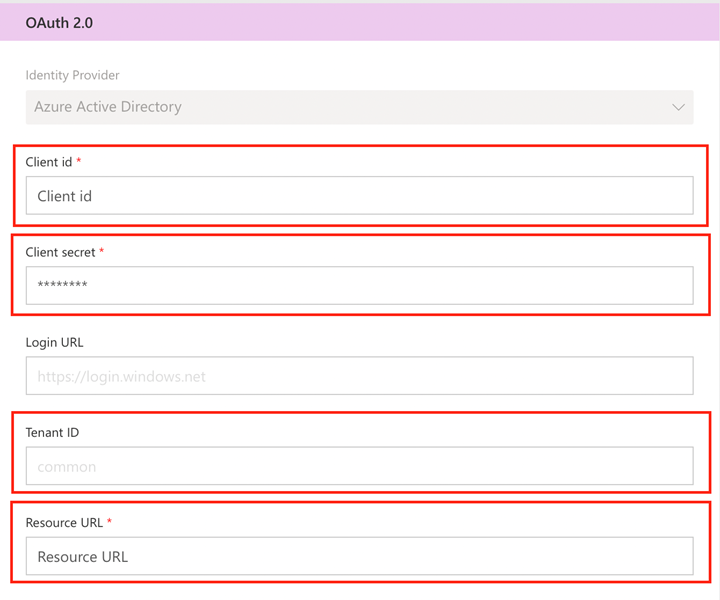
 8. Set Client ID, Client Secret, Tenant ID to your specific credentials based on your Azure AD Tenant and App registration from the above steps. Set Resource URL to [https://graph.microsoft.com/](https://graph.microsoft.com/)
 9. Go to the next page 'Definition'
10. Select Create Connector
9. Go to the next page 'Definition'
10. Select Create Connector
 ### Create PowerApps Connection
1. Go to Custom Connectors Page
### Create PowerApps Connection
1. Go to Custom Connectors Page
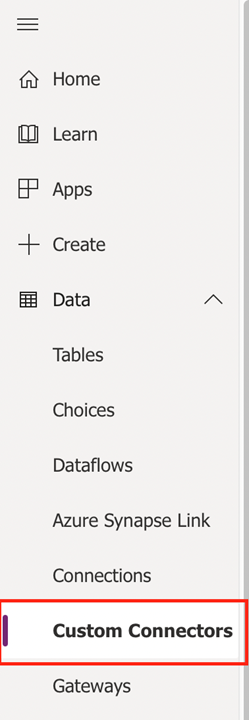 2. Click Plus button to create connection
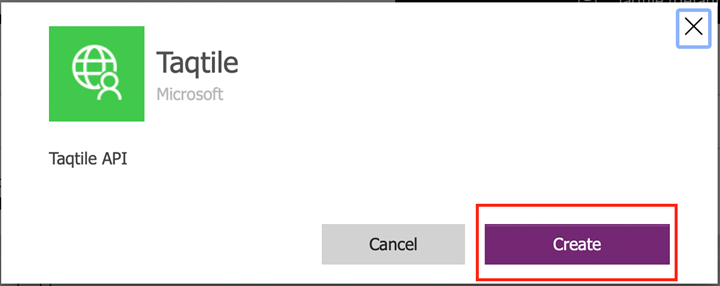
 3. Click Create and then login using Azure AD
 4. Complete!