> ## Documentation Index
> Fetch the complete documentation index at: https://docs.taqtile.com/llms.txt
> Use this file to discover all available pages before exploring further.
# Single sign-on: authentication login using Google Cloud
> Authentication and login configuration options for securing access to your Manifest domain.
## About
Single sign-on (SSO) is a type of authentication in which a user logs in to one system and is automatically granted access to other services. Single sign-on is often used within enterprise environments (and with services such as Manifest) where employees access numerous apps and services daily. Rather than having an employee create a separate set of credentials to log into every application they use daily, SSO allows a single login for authentication of many services using an OpenID platform.
There are several different OpenID providers. We have included a link below. In this article, however, we outline how to set up SSO authentication using Google Cloud.
## Prerequisites
* A Google account
* Manifest permissions and role MUST BE either Administrator or Security Administrator
## Setting up Google Cloud
* Go to: [https://console.cloud.google.com/apis/credentials](https://console.cloud.google.com/apis/credentials)
* Log into the Google account
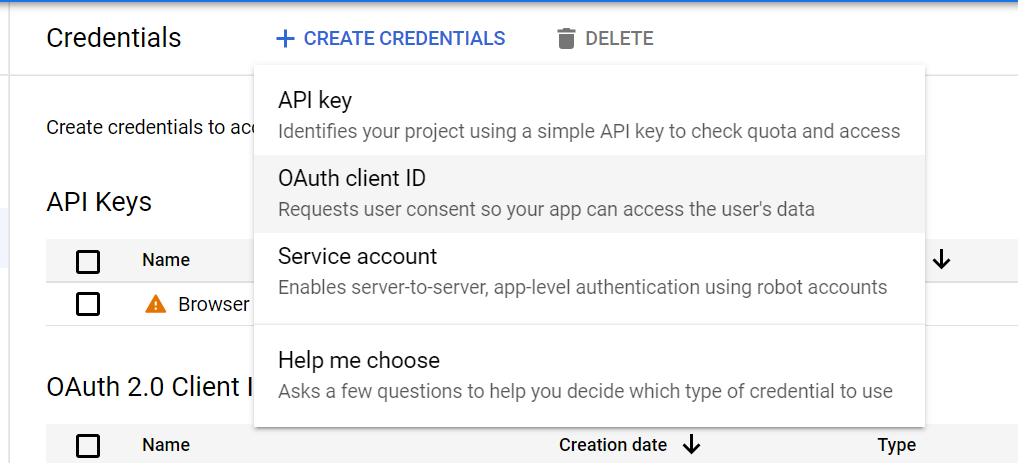
* Select **“+ Create Credentials”**
 * From the dropdown, select **“OAuth client ID”**
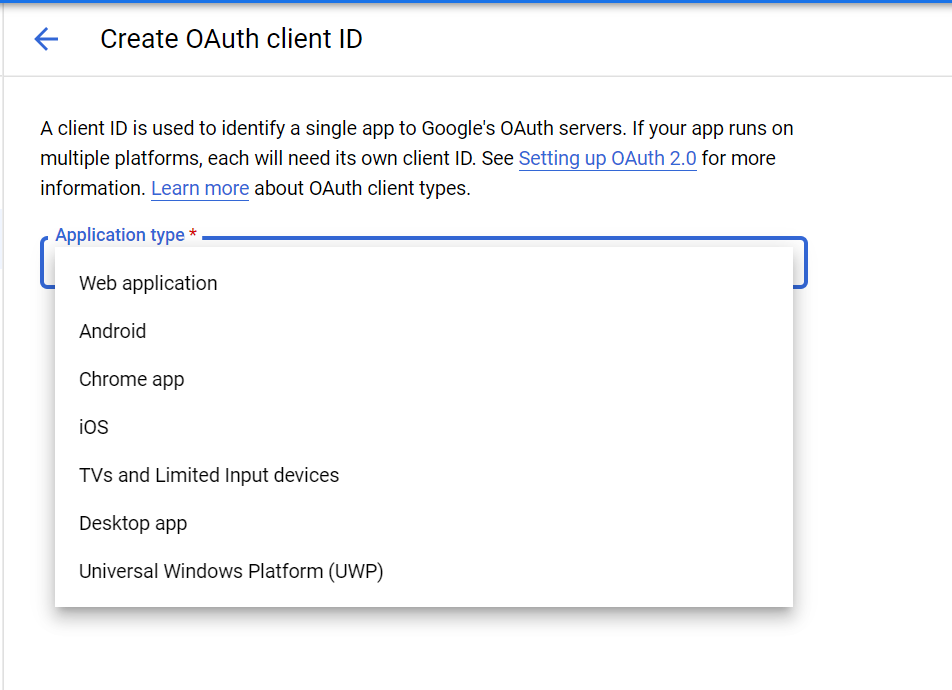
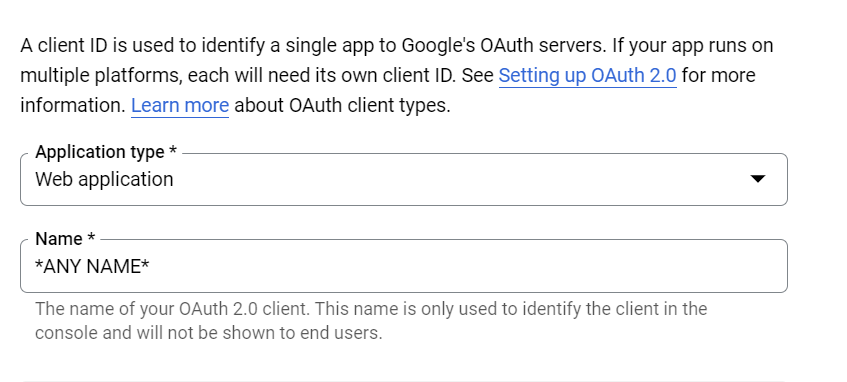
 * Under the Application Type dropdown, select **“Web Application”**
 * Under Name enter the name of your application
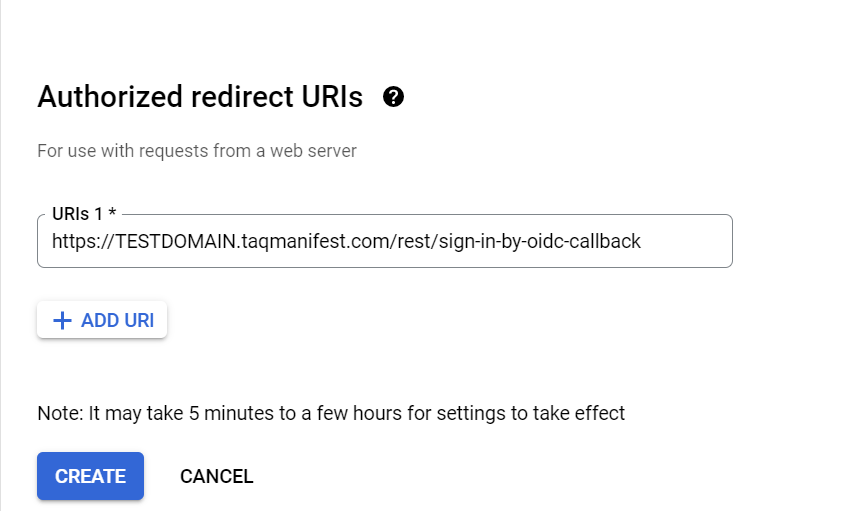
 * Under Authorized redirect URIs, select **“+ Add URI”**
* Enter in the Manifest domain name and append with /rest/sign-in-by-oidc-callback
* Example: [https://testdomain.taqmanifest.com/rest/sign-in-by-oidc-callback](https://testdomain.taqmanifest.com/rest/sign-in-by-oidc-callback)
* Select the “Create” button
* Under Authorized redirect URIs, select **“+ Add URI”**
* Enter in the Manifest domain name and append with /rest/sign-in-by-oidc-callback
* Example: [https://testdomain.taqmanifest.com/rest/sign-in-by-oidc-callback](https://testdomain.taqmanifest.com/rest/sign-in-by-oidc-callback)
* Select the “Create” button
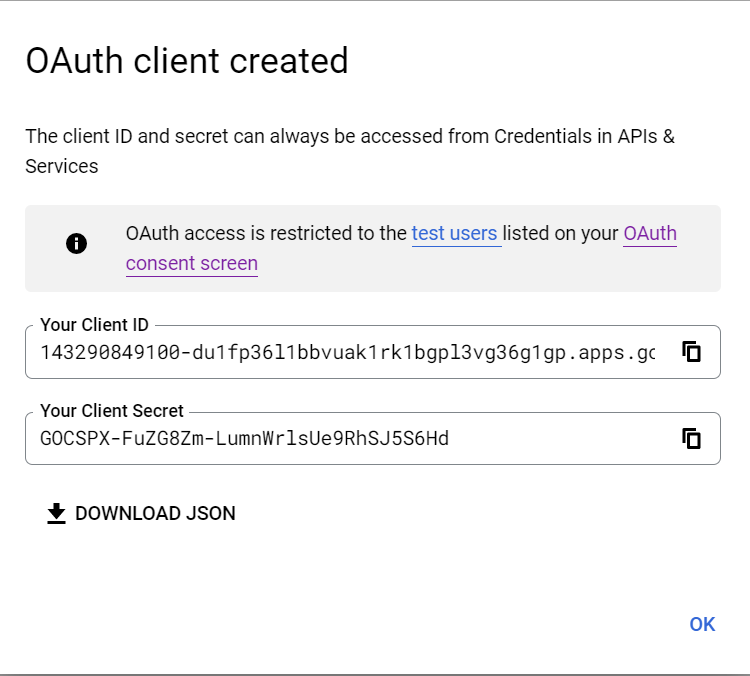
 * An OAuth client created pop-up modal will appear that will show the Client ID and the Client Secret. You only will need Your Client ID
 ## Adding Google OIDC to Manifest domain
* Log into your Manifest Web Application
* Go to Client Settings ‘Gear’ in the top right-hand corner
* Select **“Authentication Configuration”**
* Select **“+OIDC button”**
* Please note: Only (1) OIDC configuration is allowed. If this button is grayed out, then the configuration is already set up. If it’s blue, then OIDC can be configured.
## Adding Google OIDC to Manifest domain
* Log into your Manifest Web Application
* Go to Client Settings ‘Gear’ in the top right-hand corner
* Select **“Authentication Configuration”**
* Select **“+OIDC button”**
* Please note: Only (1) OIDC configuration is allowed. If this button is grayed out, then the configuration is already set up. If it’s blue, then OIDC can be configured.
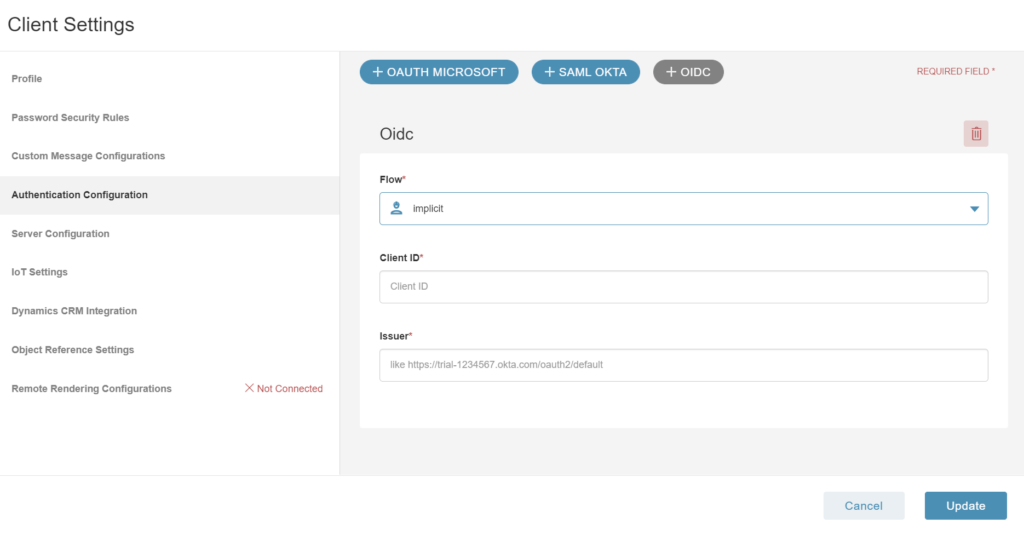 * Make sure that Flow = Implicit
* Enter the Client ID from the Google Cloud console
* Under Issuer enter: [https://accounts.google.com](https://accounts.google.com/)
* Select **“Update”**
* Log out
* Note: there is an option to sign in with OpenID Connect
* Make sure that Flow = Implicit
* Enter the Client ID from the Google Cloud console
* Under Issuer enter: [https://accounts.google.com](https://accounts.google.com/)
* Select **“Update”**
* Log out
* Note: there is an option to sign in with OpenID Connect
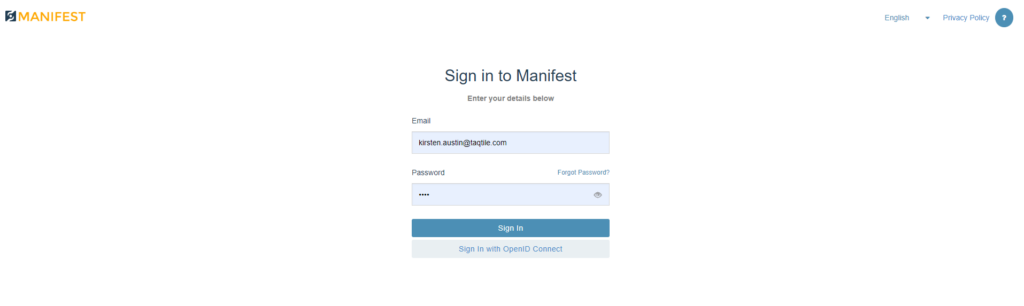 * Select “**Sign In with OpenID Connect”**
* Note: users may be prompted to select which account with which to sign in. Select that account and select **“continue”**
* Log in successful!
* Select “**Sign In with OpenID Connect”**
* Note: users may be prompted to select which account with which to sign in. Select that account and select **“continue”**
* Log in successful!